Chinook Woodturning Guild, Feb 2017
Kai Muenzer
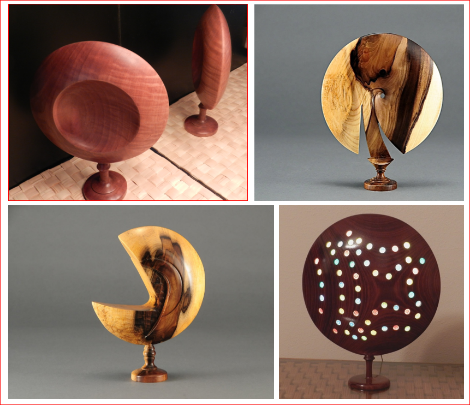
Vessels with a Foot on the Rim
|
|
A foot on the rim allows for the vessel to stand on its side! All in one piece. This provides a lot of flexibility in the design of both sides of the vessel, as well as options for extensions at the rim - for example a foot. Although asymmetric and hollow forms are possible, there are ample design opportunities with symmetric vessels. Examples of practical applications are a standing lamp, a standing clock, picture frame or a hand-mirror. |
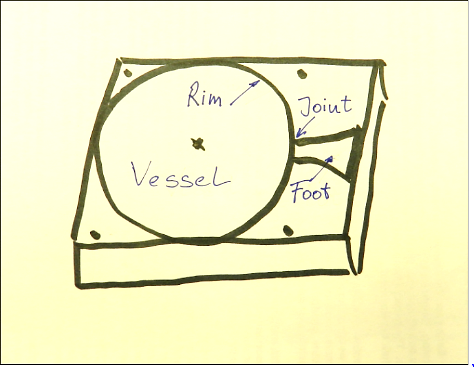 |
In the demo we start with a fairly dry wood blank of rectangular shape of about 8”x 6”x 2 ½”. The thickness of the blank dictates the maximum diameter of the foot, the short side the maximum diameter of the vessel and the long side covers the diameter of the face and the total length of the foot. The grain is running along the long side to provide strength for the joint of foot to vessel. All angles should be 90 degrees and at least one of the faces should be flat. After the vessel is turned (cross grain) we use a band saw to trim the rim before we turn the foot parallel to the grain direction. Finally, we arrive with a sculpture of one piece that has been turned at three axes. |
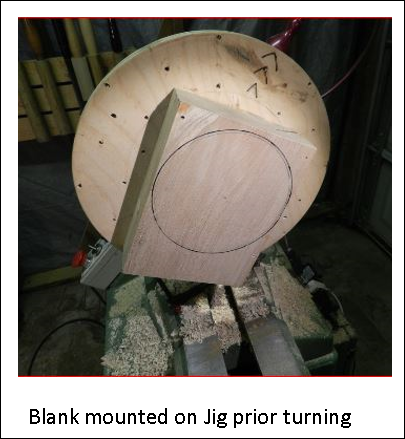 |
To turn the vessel sides, the wood is fixed by 4 screws on pre-drilled holes onto a slab (jig) that extends the dimensions of the wood. The rotational center of the vessel has to align with the axis of the lathe. For the jig in the demo we use ¾” plywood similar to the function of a faceplate with a diameter that extends the dimensions of the wood blank. The jig can either be fixed to a faceplate or mounted on to a jaw chuck. The jig allows reasonable rpm for turning, despite the eccentric mass of the blank. By rotating the mounted wood blank, we establish pencil lines to guide the turning with respect to shape of the vessel, its largest dimensions and for awareness of the location of the screws. Pencil lines along the side of the wood guide with the largest depth of the vessel, leaving a minimum allowance of the diameter for the joint. Turning techniques and tools are similar to turning a base and inside of a bowl. Note that the maximum diameter of the rim is the total widths of the blank, it is also a good diameter to shoot for as it allows a check for symmetry when turning the back side. This however requires turning some ‘air’ and accordingly steady hands and sharp tools. |
 |
A rim thickness that can support the foot may not be exceeded. This requires careful approach for the final rim cuts on both sides. We mark center and rim thickness for the foot along the sides of the blank. Consider the final intended shape of the rim -after sanding- and allow for a transition zone. We shoot for a straight line towards the edge of the rim and avoid curves, particular convex ones. |
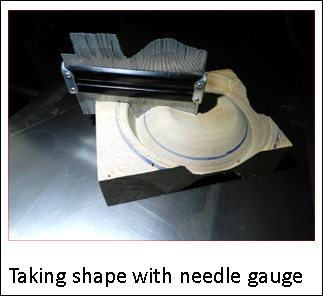 |
As both faces of the vessel are intended to be symmetric, the second face is turned without actually ‘seeing’ the first face. After finishing the initial face, we note radius and depth of high points and radius and depth of rim and any other features so they can be repeated. Cutting further is always a possibility later on, adding back on is not. We use several aides to memorize the shape of the ‘hidden side’ of the vessel, like a simple mask, that contain marks for center and rim and high points and a needle gauge. Once the shape of the first side is established the wood is flipped and fixed on the jig in precisely opposite position. Now we use the clues we gathered to mimic the shape of the opposite side. |
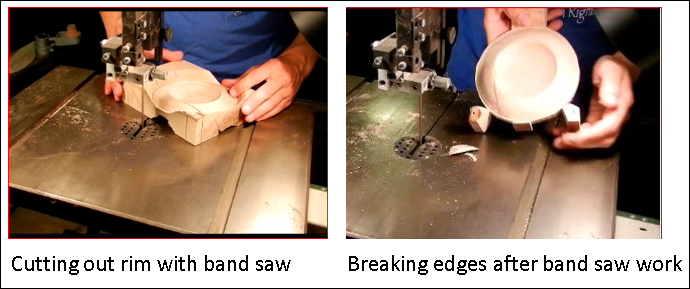 |
Before we cut out the waste wood on the outside with a band saw we mark the positions of contact for the in-between-center turning afterwards. The planar (flat) side of the wood blank allow for a good contact with the band saw table and safe sawing. Also the corners are sawn in a pie-shape to maximize stability in the sawing process. The tight radius requires blade with appropriate width. We cut out the vessel along the rim, sparing out the foot and some material necessary for the drive center mounting. Eventually we break off the corners. |
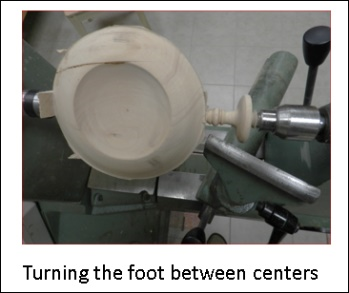 |
Now the foot can be turned in between centers using spindle turning techniques. We are limited however in moving tools and hands away from the overhang of the rotating vessel. The thickness of the wood establishes the largest diameter of the foot, particular of the surface area of the stand. |
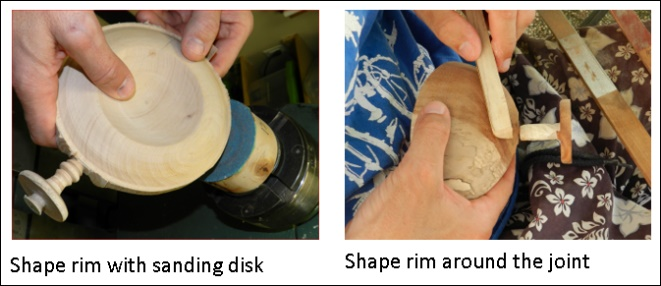 |
With the foot parted carefully, we provided the final shape the rim of the vessel with a rotating sanding disk mounted on the lathe, and in the vicinity of the joint with files and sanding sticks by hand. The shaping of the rim has to maintain the circular shape as well as to provide a smooth transition of the faces towards the edge. Touching the foot with the sand paper whilst sanding the rim has to be avoided. There are a few turning challenges with regard to safety in addition to standard bowl turning and spindle turning the are explained in the demo. Eccentric masses are rotating on both the face turning as well as the spindle turning. Assuring free rotating of the blank without hitting the tool rest or your hands is critical before every switch-on of the lathe. Maintain a safe distance from eccentric rotating mass by being aware or marking a 'never cross' line. The demo will explain the challenges and show attitudes and techniques to reduces the risks. |